Project scope
Over a few years we developed showrooms for a number of clients and eventually decided to create a more robust inhouse template for future showrooms. Our 2D artist designed a generic interface and i was tasked to realize his design. This was one of my favourite projects as i got the opportunity to build something generic that would help us in many projects to come. A nice break from the prior ad hoc development!
| Team size | 2 |
| Budget | ~200 |
| Engine | Unreal Engine 5 |
| Platform | Desktop |
The template
With the experience from previous showrooms, there were some repetitive and tedious tasks that i wanted to streamline. Adding a dynamic UI, client agnostic product management, and separating client specific logic from the template were the parts i deemed to be most important to focus on. I also wanted the ability to update and add features to the template and in then push the changes to all showrooms using the template.
User interface
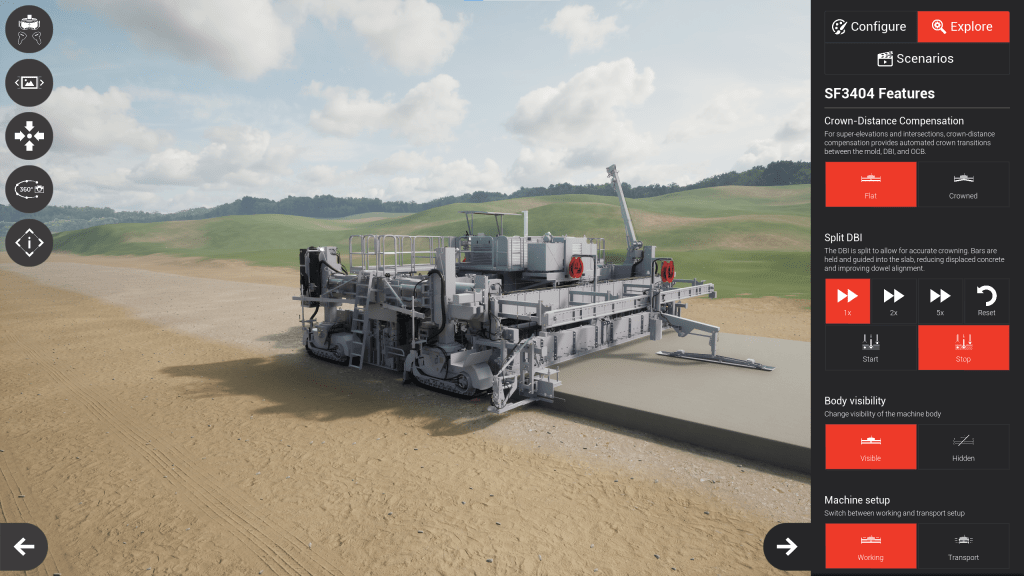
The menu for controlling the scene and camera conained a predefined set of buttons that were supposed to be static. The template UI also contained three optional menus for product selection, product configuration and feature demonstration.
Product selection was set up through a data table in which the general display information for each product, as well as its class and menu slot was defined. The contents of the configuration- and feature menus was added dynamically at runtime based on the components in the product. This ensured that we could configure menus for each client and their products while keeping it decoupled from the template. The visual style, such as fonts and colors, was defined in a data asset unique to each client.
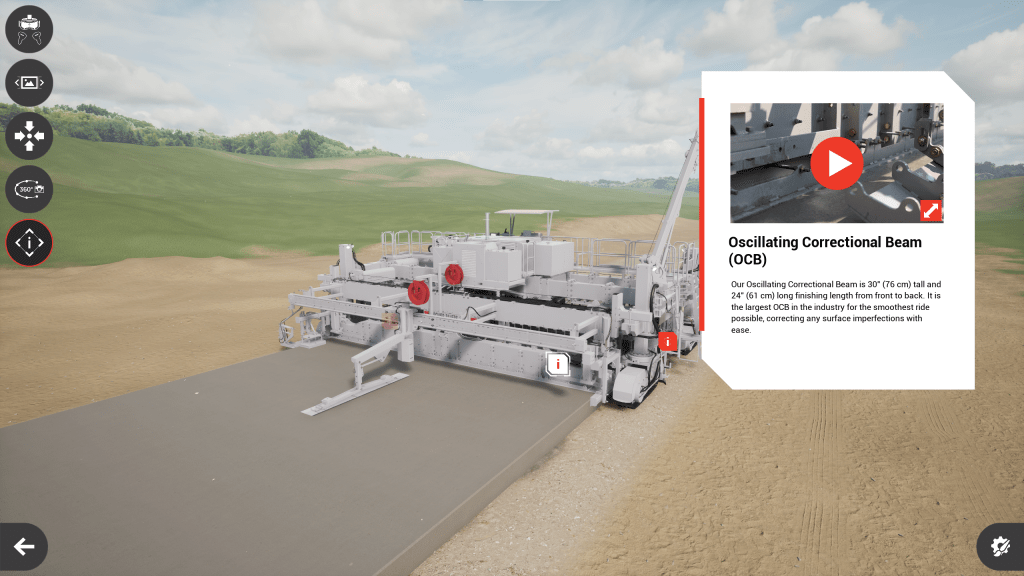
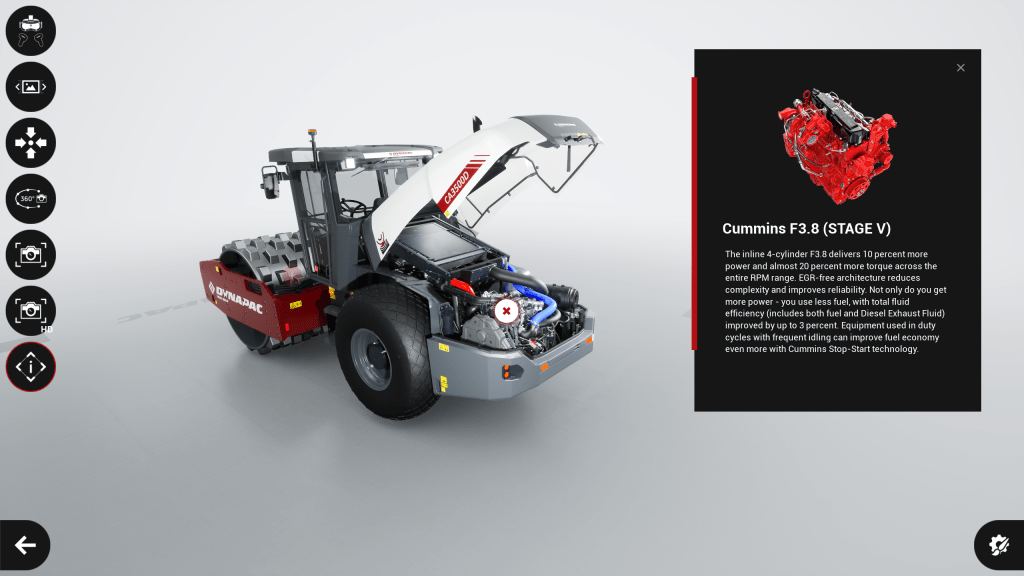
I also set up a system for points of interests with support for text, images and video. In the product blueprint, POIs can be added and also linked to trigger animations when a POI is opened. The visual design of the POI widget resided under a Named Slot, meaning the POI could be designed and animatet differently for each client.
Product management
Each product was built with a base product blueprint, containing some basic logic for hiding/showing POIs and other elements. The product blueprint was then populated with parts in the form of child actors. These were based on a few base classes, such as a plain part or configurable part.
The ability to configure a product was the hardest nut to crack. There had to be support for dependencies between parts in multiple levels as our clients had complex product configurations they wanted to showcase.
A simplified way of describing it: if Part 1 was set to Version C, then Part 2 would not be enabled. If Part 2 was disabled, the options for Part 3 would change.
In the end i did not have enough time to implement this as performant as i would have liked, but managed to make it work well enough by bruteforcing updates on all parts as soon as one part was modified, forcing each part to check its dependencies again.
Tailored logic
While some logic such as switching to VR-mode, changing environment or controlling the camera was part of the template, we would also need to add logic specific to each product.
I implemented a custom component which could be added to the product blueprint in order to create a link between a dynamically created button in the feature menu and logic in the product blueprint. Each feature component contained options for adding multiple buttons with unique text and icons, which gave us precise control of the UI without touching the UI widget. The logic was connected through events fired by the feature component. Examples of features would be to start/stop animations or hide/show/highlight certain parts.
Lessons learned
After using the template to create a few showrooms, some flaws started to show. Below are some examples of changes i would have made if i were to start orver.
- The style data asset grew large and increasingly hard to use as we added more features to the template. This should have been split into multiple assets instead. Separating the data through prefixes was not as clear as multiple assets would have been.
- The static menu did not remain static. Some clients wanted additional functionality in the menu, such as taking high resolution screenshots or playing a cinematic sequence. This menu should have had support for adding custom buttons. The intention was to keep this as a form of standard for all showrooms.
- Storing product data in a data table created issues when modifying the structure it was based upon. This caused references to classes in the table to be unresolved when the data table was used in a blueprint, and the only way i found to remedy this was to manually refresh the blueprints that referenced the table.
- Perforce merging also became increasingly tedious for each new showroom we added. When updating the template i manually pushed the changes to each individual showroom. This could perhaps have been automated, had i attended the school of perforce wizards.
Examples
Below are a few examples of showrooms we created based on the template. Each implementation has its own branding and client specific features.
Dynapac Showroom
This client wanted the ability to configure products as well as take high resolution screenshots for advertisement. This lead me down the rabbithole of ouputting a frame from Unreal Engine 5 with an object, its shadow and a transparent background. At runtime. After much trial and error i found a solution using a combination of custom materials and the draw material to texture functionality.
Power Curbers Showroom
This client wanted to showcase their latest product and the complex mechanics of its concretete paving system.